
Just so you know, this is not a tutorial series! I am writing this series mainly to give you a behind the scenes look at the process of making a game in Unity, and to document the development of this project.
See other posts in this series.
Over the last two weeks, I spent a lot of time reading and learning about shaders. Until now, I’ve been using a low poly shader which relies on geometry shaders. Since several platforms do not support geometry shaders, my goal was to find an alternative way of achieving the faceted look, without splitting my models’ vertices. I came extraordinarily close to giving up.
Monday
Today I messed around with flotation some more. It’s better now, but I’m still encountering similar issues where the ship will fly off a wave as though it’s a jump. It’s starting to get on my nerves, so I probably won’t be touching flotation again for a while.
Thursday
I got home this evening from a little ski trip (which is why I’ve left out Tuesday and Wednesday). Although I was kind of tired, I decided to start looking into shaders. Outside of the geometry shaders I threw together, I don’t have much experience writing them, so this a very new area of programming for me.
The topic of shaders also seems to be a bit of a darker spot on the internet. There aren’t nearly as many tutorials and resources as compared to other subjects, but I managed to find this series of articles on rendering from Catlike Coding. I’ve started reading a few of them, and so far it’s good knowledge.
Friday
Today I got a basic low poly shader working without the use of geometry shaders, but it’s still missing lighting and colour controls, among other things.
Saturday
Unfortunately I ran into limitations with the low poly shader I put together yesterday, so today has mostly consisted of googling for workarounds and alternatives.
Sunday
I decided not to write a blog post today. It’s spring break and I’m lacking inspiration for something to write about—probably because my mind is preoccupied with shaders. Unfortunately I haven’t made much headway in that department.
Monday
Today was another day spent trying to find alternatives to geometry shaders in order to achieve the low poly look—with little luck.
I’ve found three different ways of doing it (without geometry shaders), but while they look alright on a regular sphere, they all have some kind of drawback. I’m starting to wonder if geometry shaders are the only way to get a faceted look on my models without splitting the vertices.
Tuesday
This morning I considered simply improving my geometry shader instead of trying to find an alternative, but I wasn’t quite ready to believe there’s no other way to accomplish this. I hadn’t yet looked into compute shaders, which from my other research sounded like it could be an option.
Unfortunately, after spending pretty much all day googling, I haven’t gotten much further.
Wednesday
Before giving up this morning, I decided to check if geometry shaders run on Macs. I had read some conflicting stuff on the matter, but it turns out they don’t (at least not on my 2014 MacBook). That was the final nail in the coffin for geometry shaders, since they’re even more limiting than I initially thought.
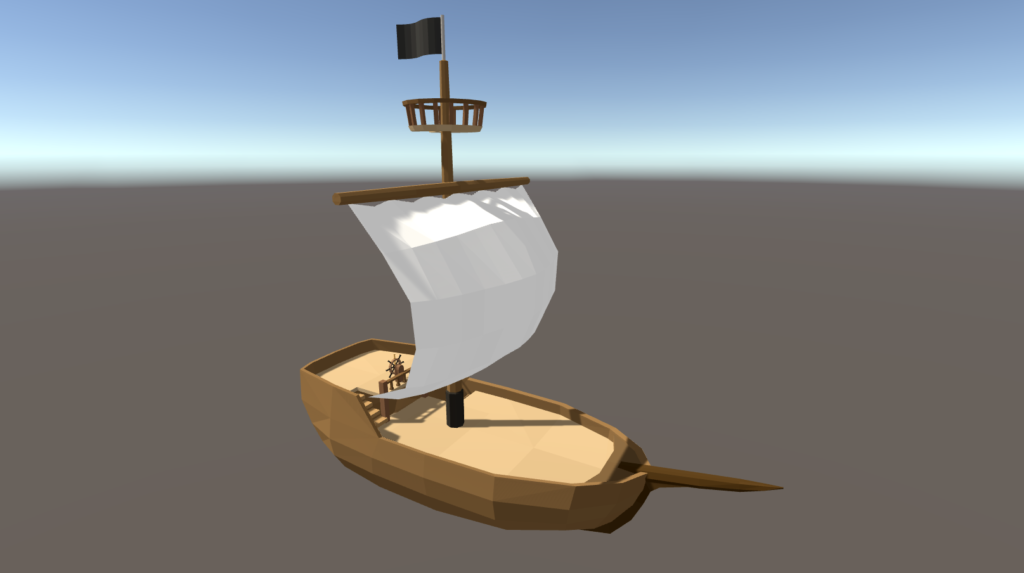
I was approaching the point of despair, thinking I’d have to split vertices on my models, when I decided to take another look at the first alternative shader I tried out. It works by taking the screen space derivatives of the world positions of adjacent fragments and using this data to calculate the normal of the current triangle’s face. Since the calculated normal will be identical for each fragment in the same triangle, the triangle will appear flat, thereby giving the low poly appearance.
The main drawback had been that the lighting was quite dark. All parts of an object that weren’t directly illuminated by a light showed up as black. The reason? I had forgotten to include ambient light in the lighting calculations. I’m glad I realized my mistake, because after adding in the ambient light I actually had something to work with again.
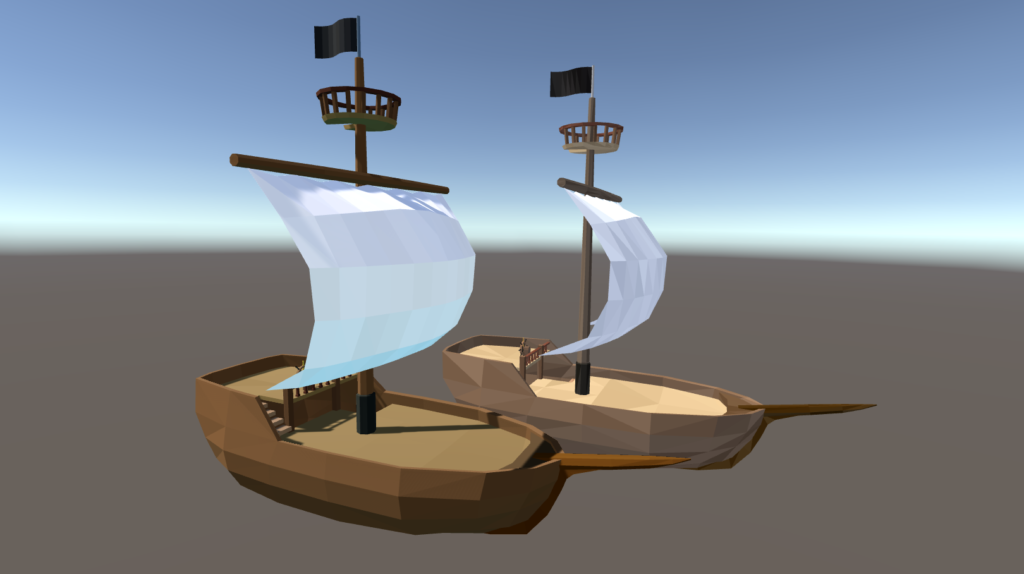
As you can see, I also added shadows to the new shader. However, there’s some issues with the colours—the bottom of the sail has a blue tint, and the visible colours don’t match the ones I set in the material inspector. In order to make the sail white, I had to set it’s colour to a light brown, which is extremely odd.
Thursday
Today I investigated the colour issue. After some unsuccessful fiddling with the lighting calculations, I decided to google it. It was quite a simple fix and it turns out my shader wasn’t even the problem. The discolouration was due to the ambient light colour, which was being set by the skybox.
Under Window > Rendering > Lighting Settings, changing the environment lighting source to white did the trick.
Saturday
This afternoon I added the ability to render both sides of an object to the shader. Weirdly enough, this produces some issues with the way shadows are rendered, but only on the back side.

Sunday
Today I looked into the shadow bugs, and unfortunately, they’re to be expected with thin geometry (according to this post on the Unity Forums). Afterwards, I finished writing and editing this post.
What’s next?
The next step will be to adapt my new low poly shader to be capable of simulating water. Then I’ll rework the ship model a little so it fits better with the new shader. While I’m at it, I’ll probably add cannons and a ladder to the crow’s nest, but I likely won’t get around to making those functional.